What if there was a way you could use automation to make blogging, editing, and publishing easier? With productivity systems like Kanban, GTD, and Zapier, I’ve created an automated blog workflow using Nozbe, Zapier, and Google Documents.
Today, you get a behind the scenes look at my automated workflow and have a chance to steal it for yourself.
Blog Writing Project Setup
Kanban is a productivity system made popular by Toyota and has become an integral part of many team workflows. You’ve seen Kanban in action if you’ve ever used the popular app Trello.
The basic Kanban system involves moving tasks through a series of specific phases. Usually this is something along the lines of: To Do, Doing, Done.
This system is great for getting an overview of your current project workload and keeping tabs on all the moving parts. After tracking my blog writing, I came up with four main phases in the process:
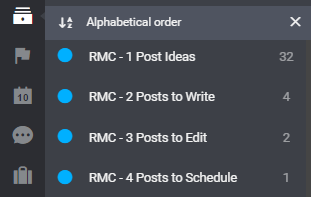
As a new post goes through the writing process, the task is moved to the next project in the process.
But, tracking tasks alone wasn’t enough to streamline my process. I wanted to automate the creation of documents, linking tasks and documents, and the creation of my pre-publication checklist.
Start by Tracking the Workflow By Hand
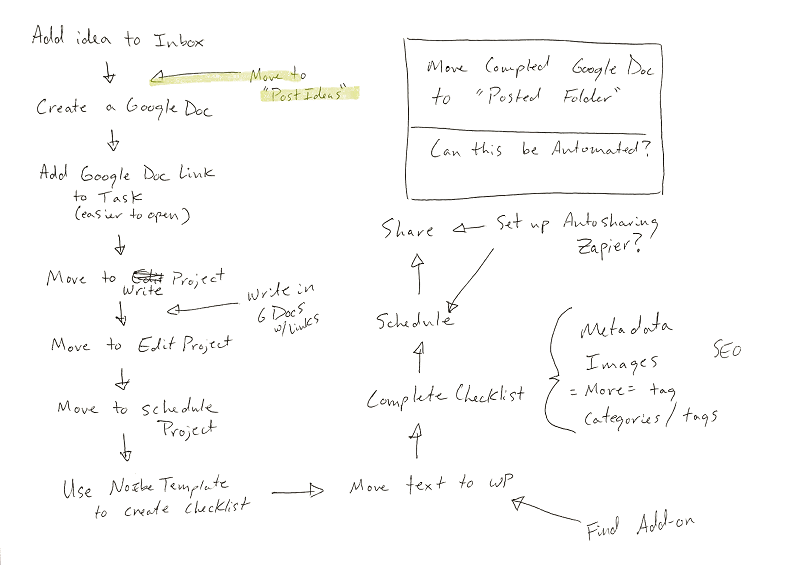
The first step in automating any system is understanding the steps involved when it’s completed manually.
So on my next blog post, I tracked every single step from start to finish. Here’s what I came up with:
What is Zapier: Hint…Automation
Zapier is an awesome tool that, according to their website, helps you
Connect Your Apps and Automate Workflows. Zapier moves info between your web apps automatically, so you can focus on your most important work.
It makes automation easy and available to anyone through both free and paid plans.
What does this mean to you?
It means that you can connect Nozbe to over 200 different apps with endless possibilities. It was those possibilities that helped me create an automated blog workflow.
After a little experimentation, here’s the workflow I eventually came up with.
[callout]Get My Free Video Training: The Exact Zaps I Use In My Automated Blog Workflow[/callout]
My New Setup
1. Add Ideas to Nozbe Inbox
Between reader questions, requests from twitter followers, or scratching my own itch, I never seem to be short on ideas.
I practice elements of David Allen’s GTD methodology and capture all of my blog post ideas in Nozbe’s Inbox.
Most of the time I use the quick entry shortcut (ctrl + shift + space on my Windows machine)

or Add to Inbox on my iPhone.
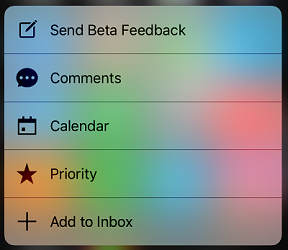
If a reader sends me a request through email, I’ll forward it to my Nozbe address using Nozbe’s Email Integration.
2. Move Task to “1 Post Ideas” Project
This is where I create my project backlog.
At first, I used Zapier to create new documents at this point but ran into a problem with organizing all the documents I created with each new idea.
3. Move task from “1 Post Ideas” to “2 Posts to Write” to create a new Google Document
Here’s what this looks like in Zapier:
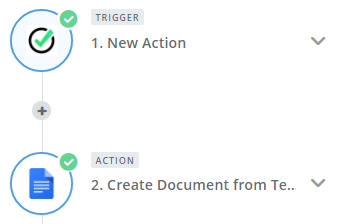
With the trigger moved to this step, my folder only contains current working documents.
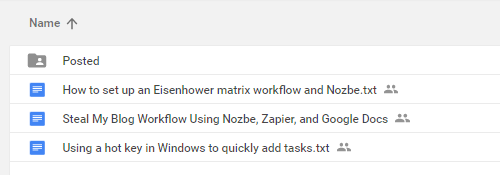
I try to limit working documents to 3-4 so I can focus on creating great content instead of organizing or getting distracted. Not only that, but it keeps my priority list smaller.
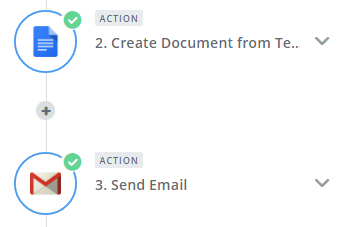
4. Newly Created Google Docs trigger a task comment with a link to the document
Here’s what it looks like in Zapier:
And here’s what it looks like in Nozbe:
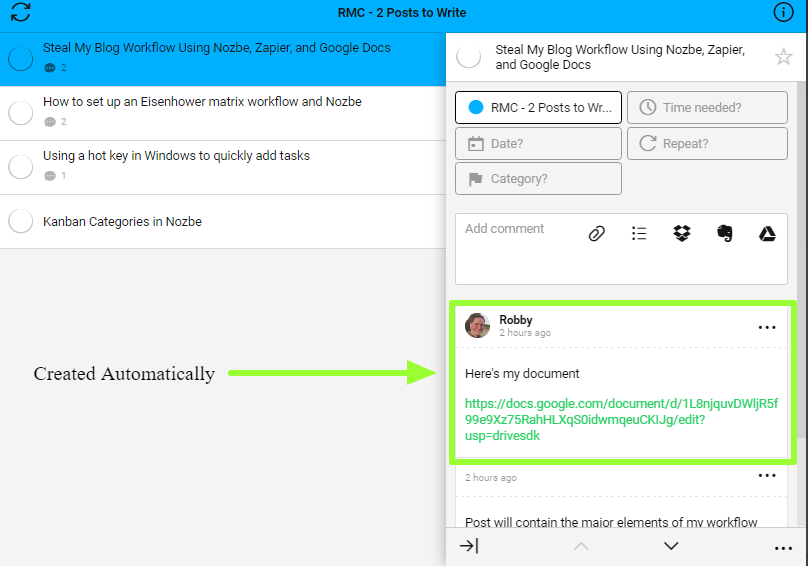
I have the Google Drive integration set up in Nozbe, but find it difficult to actually work with. When documents are added via the integration, you can only open a read-only version.
On the other hand, having the direct link as a comment lets me click the link and be taken right to my document for editing. I can start writing right away. Plus, this is the greeting I set up for all new docs:

The important part of this workflow is having the task and everything needed to move it forward in a single location.
Having everything in one spot eliminates most distractions when it comes time to actually write.
5. Move the Task to “3 Posts to Edit”
No special triggers in this step. I do it the old fashioned way…drag and drop.
But it keeps my tasks organized as I move a post from idea to publication.
If you have an editor, this would be a great time to delegate the task by assigning it to them in Nozbe.
6. Move the Task to “4 Posts to Schedule” creating a Post-Publication Checklist.
Here’s what this looks like in Zapier:
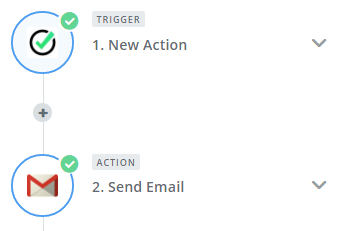
Whenever a new task is created in “4 Posts to Schedule” Zapier automatically sends an email to my Nozbe email address.
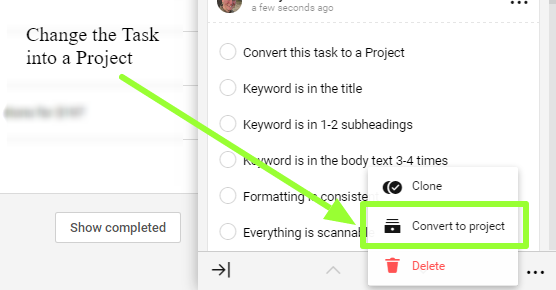
The email to Nozbe creates a task in my Inbox with a checklist comment. The checklist contains all of the final steps needed to polish the post for publication.
Next, I manually convert the “Publication Checklist” Task into a Project like this:
8. Complete Checklist Project and Schedule Post
Transferring posts from Google Docs to WordPress has never been easy. The html usually gets pretty messed up in the transfer.
I found an app to fix this, but it was too expensive for my taste. Wordable.io is an awesome tool, but there’s a new app in town made by the Automattic, creators of WordPress, that does the same job for free.
This new app, WordPress.com for Google Docs Add-on, creates a working draft post on my WordPress site.
A few final edits, add some metadata, and finish out the checklist. The post is ready for publication in no time.
[callout]Get My Free Video Training: The Exact Zaps I Use In My Automated Blog Workflow[/callout]
Manual v. Automatic
Could someone complete all of these tasks manually?
Yes, and I have.
The purpose of automating systems is to leverage the tools available to make work more productive. You can focus on your best contributions instead of being a data shuffler.
People were designed to be more than robots who move information back and forth. Automation allows us to focus on the one thing only humans can do…creative work.
Each week I save hours by automating systems like these.
They help me create more time, more content for this blog, and most importantly more time with my family.
[reminder]What steps can you take to automate your routine tasks and what can you do with that extra margin?[/reminder]
